User Interface
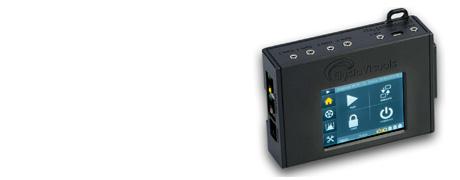
 The RamperPro has a touch screen interface. There are no physical buttons that you need to control the unit. You can operate the RamperPro by pressing the icons with your finger or with the supplied touch screen stylus.
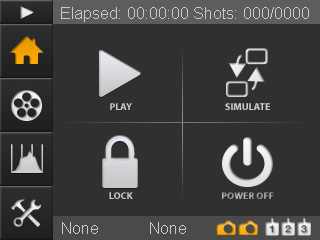
At the left you see the default home screen of the RamperPro. The header of the screen will always show you information that is within the context of the current screen. In this case you see runtime information. This runtime information will be updated when the RamperPro is actually running. The footer shows two orange cameras. This means that the RamperPro is configured to run for two cameras. A white camera indicates an inactive camera. The text "None" indicates that no camera is connected via USB. These two texts will be replaced by the name of the camera(s) that are discovered by the controller when you connect them via USB. You can press the "None" texts or the name of the discovered camera name. That will show you a screen with the details of the connected camera. That way you can see which camera is found to be number one and which camera is detected as camera two.
There are two different button bars that are always displayed on the left of the screen. Here you see the "Home', "Movie settings", "Preview" and "System settings" buttons. You are currently on the home screen, that is why the home button is orange. You can always start the RamperPro by pressing the small "Play" button that is displayed on the top of the button bar. That will initiate the start sequence and the RamperPro will start to take pictures if no configuration errors are detected.
The center of the screen contains the main action buttons. Different screens can display different action buttons that open up the functionality of the RamperPro. The "Play" button is used to start the RamperPro. The "Simulate" button displays a detailed runtime simulation overview of the configured timelapse sequences. This can be an overview per camera if the cameras are configured to have different settings. The "Lock" button locks all buttons except for the "Unlock" button that will appear when you lock the screen. That way you cannot accidentally stop a timelapse when the unit is running. The "Power off" button is used to power down the RamperPro in a graceful manner.
All buttons have alternating colors that you will see when you press a button. That way you can easily see if you have really selected the correct button. You can always move your finger of stylus away from the button while you press it. That way can can release your "press" outside the button area. That way you are not actually pressing the icon and therefore you are not actually selecting the underlying functionality.
Left navigation bar

There are two different left navigation bars. The first bar is for example shown on the home screen. There is also a left navigation bar that is used for screens when multiple options are available.
You can scroll though screens when the available options don't fit on one screen. An example is the configuration of the exposure ramping engine. There are just too many options to show at once. The RamperPro will show the navigation bar as show at the left when you can scroll though the various options. Use the "Up" and "Down" buttons to navigate through the different pages. You can always navigate back to the previous page by pressing the "Back" button. The icon at the top of the navigation bar indicates the context or setting of the page that you are currently in.
Parameter values that are changed are saved as soon as one of the buttons on the navigation bar are pressed. This basically means that changed values are saved as soon as you navigate away from the screen.
Editing values
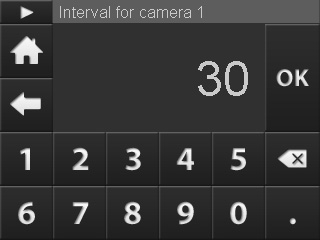
There are two ways that you can use to enter or modify parameters. There are sliders that you can use. You can modify the value of these sliders by dragging the slider over the screen. There is also an on-screen keyboard that you can use to enter your value of choice. You can simply press the value on the parameter screen that you want to modify. The value will get an orange border if you select it. This will then show the on-screen keyboard that you see at the left. The title of the screen will always show you which parameter you are modifying. You can use the buttons the modify the value. You can also modify time values with this keyboard. The keyboard will then show a cursor that indicates the digit that you are currently modifying.
It if of course possible to enter strange parameter settings. The validity of certain parameter values is depending on the value of other parameters. An example is that the end ISO must be larger than the start ISO when you are exposure ramping a sunset. The RamperPro will check these parameters in their context when you either press the "Play" or the "Simulate" button. These configuration "errors' are not validated in the on-screen keyboard because that would result in many messages while you are still configuration your timelapse sequence.
You can press the "Back" button in the left button bar if you which to exit this screen without modifying the actual value. Press the "Ok" button if you want to save the value. All values are saved almost immediately. This means that the RamperPro will always startup with all parameter values of the previous session. You can also always return to the home screen by pressing the "Home" button.
Getting help
The RamperPro contains a lot of fields that you can use to configure the various parameters that control your timelapse sequence. All of these fields have a label that indicates the meaning of the field. You can get help of the field by pressing its' label. That will give you a popup that describes the meaning of the field. Note: The initial release of the RamperPro firmware will not contain a detailed field description for all parameters. These descriptions will be added in (free) future releases of the firmware.