How to achieve the proper exposure after sunset
This page is obsolete since the introduction of firmware 3060. We will rewrite it soon. The latest software on the RamperPro are not giving the results that are explained below! The overall exposure is now automatically set by the RamperPro.
The RamperPro is working based on the concept of "expose to the right". That means that the histogram will be "pushed" to the far right. This gives the most detailed information possible in your image files and that is a great starting point for further post production steps. The amount of how far to the right the RamperPro should expose is defined by the "Right clipping" and "Right cut off" parameters. These parameters are defaulted in the non expert mode; you can set them yourself in expert mode. The histogram is decided in 256 bars, just like a histogram in Photoshop. The right clipping parameters defines how many bars at the far right should be taken into account. The right cut off parameters defines how many pixels are allowed in that area before over exposure is defined.
A few examples of setting up the histogram mode:
- Right clipping: 1
- Right cut off: 5
- This means that over exposure is defined as soon as the histogram on the far right (only one bar is selected) has over 5 pixels. In practice this means that over exposure is detected pretty soon since a few pixels at the right part of the histogram will be interpreted as over exposed
- Right clipping: 5
- Right cut off: 20
- This means that over exposure is defined as soon as the histogram on the far right has over 20 pixels the 5 bars at the far right. This means that the image can have slightly blown highlights before over exposure is found. This can be desired when you want to have the sun in the image.
Exposing to the right works pretty good until sunset time. The overall shape of the histogram changes after sunset because of the dramatically changed conditions. This also means that you don't want to expose to the far right after sunset. A slight under exposure will result in better results with more contrast in the sky. These slightly under exposed images will also be more in line with the images shot before sunset.
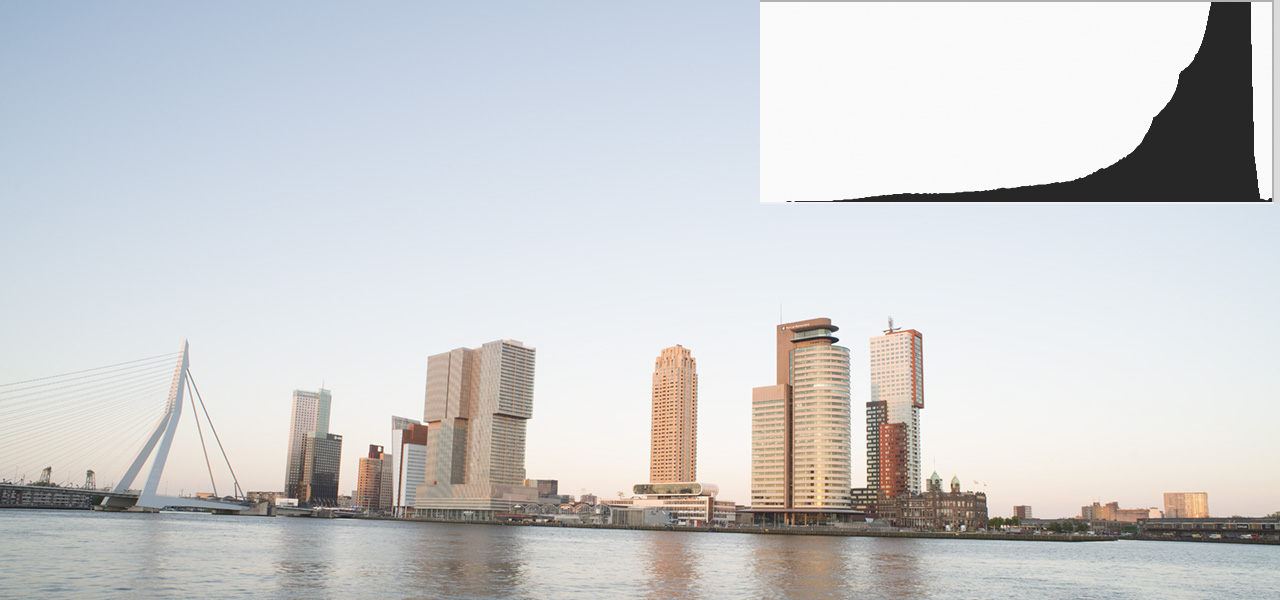
Lets see how two images that are properly exposed to the right look like when we compare the exposure before and after sunset:
 |
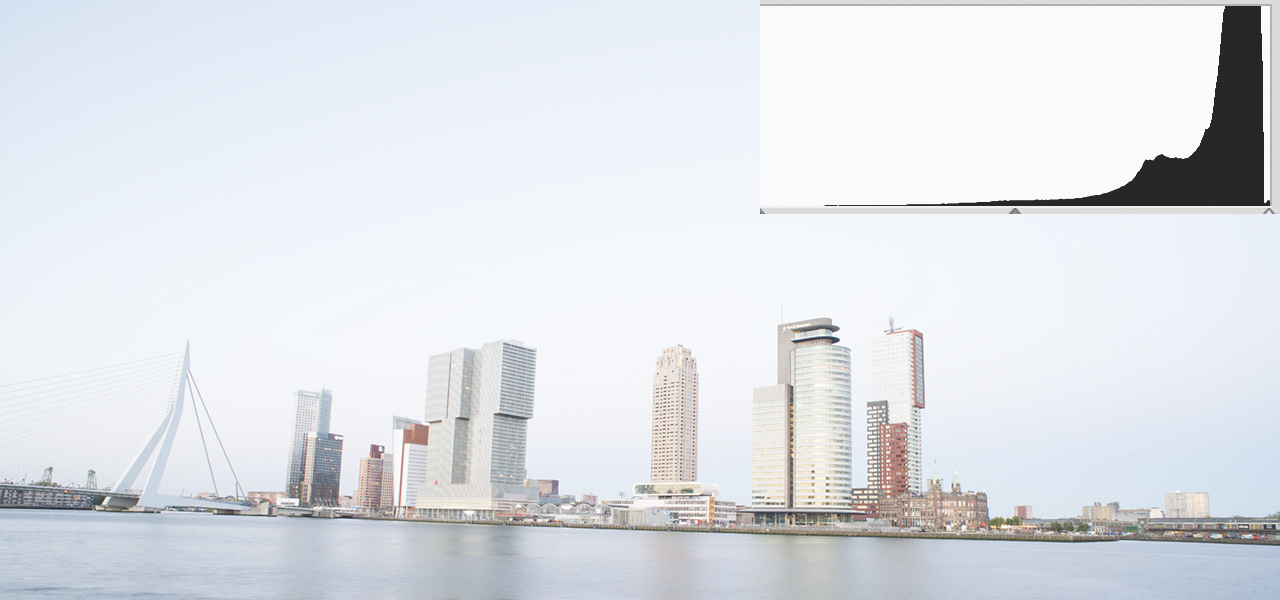 |
| This image is taken before sunset. Its properly exposed and contrast looks good. | This example is taken after sunset. This image is technically properly exposed. The histogram is not clipping. The histogram also shows a different shape compared to the example shot before sunset. Overall the images looks to be very bright. |
How to prevent a brightness shift after sunset
The above example shows that you want to, slightly, under expose after sunset. You don't want to overdo it by under exposing too much. The under exposure should only be applied just after sunset to prevent what the above histograms show. The RamperPro should continue to properly expose to the right when its a few stops darker.
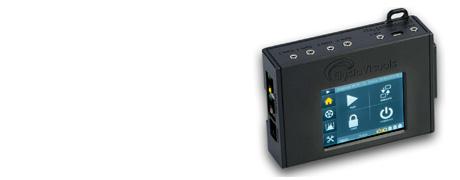
The key setting to control all of this is the "Minimum time per stop" parameter that you can find on the light sensor setup page. The "Minimum time per stop" is defaulted to 5 minutes in non expert mode. This is an average value it it works in average conditions. But this could mean that your images get a bit too bright after sunset based on the time of year and the location where you are shooting. You can override the value of the "Minimum time per stop" parameter in the expert mode setup. Setting this value yourself gives fine grained control about how the RamperPro should behave and this is mostly applied to shots taken around sunset time.
The value of "Minimum time per stop" tells the RamperPro how fast it is allowed to ramp. It can be seen as the fasted ramp speed that you allow during your shoot. A value of 5 minutes means that you allow the RamperPro to ramp as fast as 5 minutes per stop. The RamperPro has a highly advanced way to determine how fast it should follow changing conditions, but the light sensor is the most important method to determine this. Light changes the fastest around the actual sunset time. This really depends a lot on the time of year (winter or summer for example) and your location. Ramping occurs much faster in the tropics that is does in Northern European or North American conditions.
You need to use a larger value for "Minim time per stop" when you get images that are too bright as shown in the example. The bright image in the example was shot with a value of 5 minutes. It would have been perfect (during summer in Europe) with a value of 00:06:30 minutes. You need to use a smaller value (00:04:00) for example when your images are too dark after sunset; that is the situation in more tropical situations. You probably need to test this once or twice, but then you get control on your shoot yourself.
We are currently working on a full-auto method for the minimum time per stop parameter. That method should do the trick automatically for you. But we also receive a lot of requests to not remove this parameter since a lot of shooters prefer to take control in their own hands.