Install and Copy the SD Card
RamperPro firmware updates and the SD card
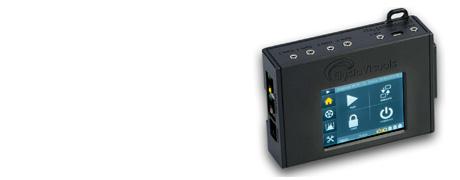
The main software of the RamperPro is placed on the SD card that you place at the bottom of the unit. The RamperPro can update the firmware automatically when you connect it to the internet via a network cable. Please use the proper connection for this. The double "network" connectors next to the light sensor connector are not network connectors since these are MoCoBus connectors.
The network connector of the RamperPro is available next to the two USB connectors. Connect a network cable and make sure that this network cable provides internet access to the RamperPro. The RamperPro will then acquire an IP address via DHCP; this is the most common network configuration. Navigate to the firmware update screen (see system settings). The unit will then check if any updates are available. You can then update the firmware via this screen.
Install a fresh SD card
Please perform the following steps when you want to freshly install a RamperPro SD card:
- Download the latest SD card image from this page.
- extract the zipfile on your PC (this can be a OSX, Windows or Linux based system as it is explained on this page).
- Write the .img fle to your MicroSD card
- Don't forget to update your RamperPro when you have inserted the new SD card! This page describes you to do that.
The MicroSD card of the RamperPro is tugged away at the bottom of the unit. You can use a pointy object to get it out.
Use Balena Etcher
We have seen that the zip tool on OSX contains a bug that results in a wrongly unzipped file. We recommend to download the Stuffit tool from the OSX App store. Stuffit extracts the downloaded zip file without problems. We have seen that the default zip tool from Windows is sometimes unable to extract the large zipfile that holds the firmware file. We recommend WinRAR to extract the file. 7-Zip seems to have difficulties with properly extracting the zip file.
- Download Balena Etcher: https://www.balena.io/etcher/
- Connect the new MicroSD card to you Mac with a card reader
- Start Etcher. Here you can select the .img file that you got after you unzipped the downloaded file. You can also select the MicroSD card where you want to write the file to.
- Now Etcher can copy the .img fle to your MicroSD card.
- Exit Etcher and eject the MicroSD card.
- You can now use the new MicroSD card in your RamperPro.
- Don't forget to upgrade the software of your RamperPro now.
Take a space MicroSD card with you
It might happen that you MicroSD card gets corrupted in the field. We recommend to take a space MicroSD card with you. That way you can always use your RamperPro.